Thought for the Dazed

I've had to give up that Distance Learning course as I was having trouble seeing the teacher.

Flickr
www.flickr.com
RobMiles' items Go to RobMiles' photostream
Twitter
C# Yellow Book

Search entire site
Sunday
Jun242012

Making Boxes for Gadgets with an Ultimaker Printer

IMG_0302.jpg

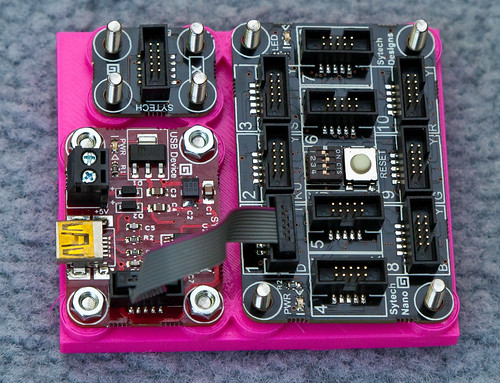
Ultimaker and Gadgeteer would seem to be a match made in heaven. Gadgeteer gives you a bunch of hardware devices that you can connect together and program using .NET and Ultimaker gives you a way of making a box to put them in. I’ve spent today finding out just how easy it is to do this, and just how much fun. I spent some time last week printing my name, which was fair enough I suppose, but today I wanted to get started making some boxes for gadgets.

I started off using the AutoDesk 123D software but in the end I gave up on it. It is a great program for making ornaments and trinkets, but didn’t seem to make it easy to create engineering type drawings. I wanted everything to be just the right size and correctly positioned, and the program didn’t seem to make it easy to do this. So I switched to FreeCAD, following up on advice from Andy in a comment on the post last week. This has the feel of a proper CAD program (although I’ve never used a proper one, so I don’t have much to compare it with). Finally I figured out that the best way to make something complex was to use the Sketch view to draw something on a plane, and then extrude that into the model. That way I could cut quite complex shapes.
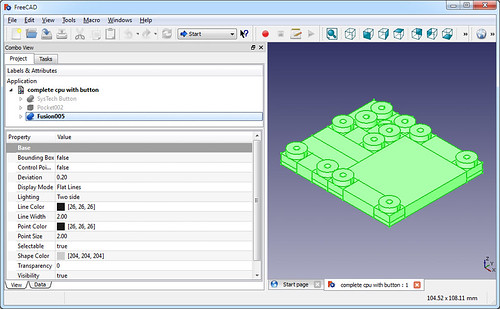
FreeCad.jpg

This is the view of my finished product, It has mounting blocks for a Sytech processor, power connector and button. The blocks are all individual components which I can assemble on a grid any size. The nice thing about the Gadgeteer devices is that they are all based on a grid mounting, with everything happening on 1cm boundaries. This makes it very easy for me to create some pins that I can use anywhere. The design above needs a little work, as the round mounting pillars are a bit too wide for the Gadgeteer standard, but for most of the devices I’ve found they work just fine.

Once I had made my design I had to convert it into an STL file (no problem, FreeCAD just does this) and then make the set of printer instructions. I used Cura for this. Finally I put my design on a memory card and turned the Ultimaker loose. I’m slowly getting the hang of 3D printing. Now that I’ve fixed all the leaks my problem is that sometimes the very first layer is not sticking to the printer bed. This means that the printer just extrudes plastic into the air and nothing gets made. I think I know how to do it now though, you have to adjust the print head so that when it is closest to the surface there you can just about pull a single piece of paper back and forth underneath it. And you have to make sure that this is the case across the entire printer surface.

IMG_0307.jpg

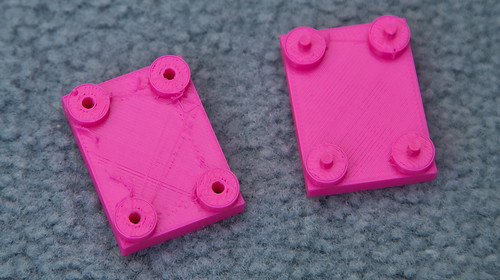
These are my early prototypes. For the first one, on the right, I tried to extrude pillars that I could just drop the board onto. I had a theory that I could just tighten a nut down onto the pillar and it would just self tap a thread into the pillar. Didn’t work. The pillars are not that strong and they snapped off. But for me the really amazing thing was that the Gadgeteer board just fitted onto these pillars. All the dimensions I had carefully put into FreeCAD were being reflected exactly in the finished article. Kudos to the Ultimaker crew, they have made a printer that prints things exactly the right size. If anything had been even slightly out of whack nothing would have fitted. As it was, once I’d cleaned off the excess plastic, I could just drop the board on.
IMG_0306.jpg

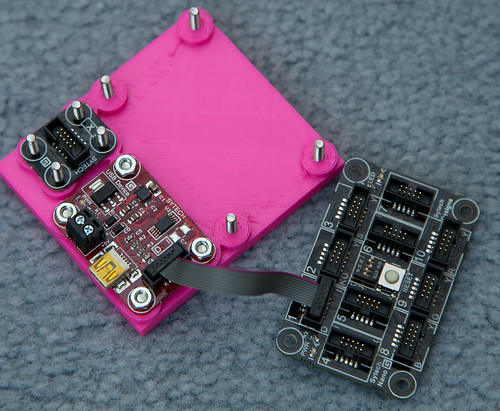
Version 2, which is where I am now, has bolt holes through the plastic pillars which I can then use to screw the boards down onto. I’ve made a three board carrier which you can see above and again, everything just lines up. Astonishing.

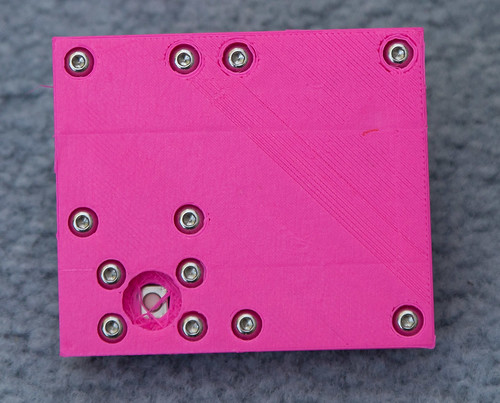
I’ve even managed to break one of the golden rules in 3D printing, and print overhangs that let me countersink the bolt heads in the surface underneath.
IMG_0309.jpg

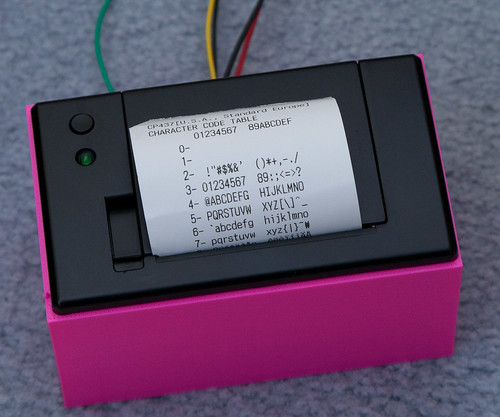
This is the view from the other side of the board. The heads are all countersunk. the big hole in the bottom is meant to be there, it is a push button. The idea was to make a round button to fit into the hole. Unfortunately, being an idiot, I’ve got the large and the small holes the wrong way round, so that my button will just drop onto the floor. Still, I’m very pleased with the results from just a day of playing with the software and the printer. Last night I also made a case for my thermal printer, which turned out rather nice too.

IMG_0298.jpg

Once I get everything sorted I’ll put the designs on the interwebs somewhere for anyone who is interested. Just a great way to spend a day….
Saturday
Jun232012

Drill Power

IMG_0281-Edit.jpg

I bought this today to replace my old rechargeable drill, which started to make a funny smell whenever I tried to use it. Who knows what damage I can do with this new one?

Incidentally, I’m a bit confused as to why they call it a “funny” smell. It didn’t strike me as particularly amusing. The only funny smell I can think of is laughing gas. Ho ho.

Friday
Jun222012

Microsoft Bluetooth Keyboard

image

Another day, another plug from Rob for some Microsoft stuff. Actually I do buy things from other companies too you know, as far as I’m aware Microsoft do not make Strawberry flavoured milk yet.

Anyhoo, they do make some things that are quite nice. I’ve always liked their bendy keyboards, being fairly sure that the main reason that my fingers have not dropped off/seized up yet is that I’ve been using their Natural Keyboards for many years now. They provide very good wrist support and let you type at a more natural angle. Of course you lose all that when you open up your laptop. Until now.

The Microsoft Bluetooth Mobile Keyboard 6000, which you can see above, is intentionally bent. It also comes with a somewhat superfluous numeric keyboard which I’ve left in the box as I can’t see the point of it. But the keyboard is very good. I’ve paired it with the Samsung Slate and it works a treat. It is very thin, so it fits in my bag with no problems, and when I’m typing I can feel the difference.

The key action is pretty good for a device of this type. The Bluetooth keyboard that comes with the Samsung Slate has a very nice action, but is not bendy, and for me some of the keys are now wonky on that keyboard, which is a bit annoying. Actually, the mobile keyboard with the best key action is the Apple Bluetooth one, but unfortunately it isn’t bendy – at least not in a way that would leave it useful afterwards.

I picked up my keyboard cheap from Amazon. They have this thing now where you can find used examples of stuff that you want, and for the first time I tried this. It worked very well, the item arrived well packaged and in good time. This is looking like a good alternative to eBay. None of the bidding daftness, and the prices are very competitive too.

Thursday
Jun212012

Making a Name for Myself with Ultimaker

DSCF8302.jpg

I’ve been spending more quality time with my Ultimaker 3D printer. Making designs from other people is kind of fun, but I really wanted to design and build my own components. So tonight I fired up Autodesk 213D beta and had a go. Turns out to be quite easy and fun. The Autodesk program is quite easy to drive, although it definitely has the feel of beta software, with the odd crash and lockup here and there. You also have to sign into the Autodesk site and the default is to publish your designs for everybody to see, which worried me a bit, particularly as the first design I did was the one above….

It proved quite easy to draw some text, extrude it into 3D and then connect it to a block. The 123D program can export to STL files and I used the Cura program to create the file of printer commands.

Tonight I actually got around to building up the UltiController part of the system which allows me to print objects without needing a computer. I just put the design files onto an SD card, pop the card in the controller and set it off. The printer is behaving itself at the moment, with no leaks (reaches out and touches convenient piece of wood) and did a pretty good job. My first attempt got the size a bit wrong and tried to print one that was a bit large, but I re-rendered the design in Cura with a scale factor of 0.25 and got the result above, which is around half an inch on the long axis.

The next step is to design and make some plastic components to mend the piano, at which point the printer will probably have paid for itself…..

Thursday
Jun212012

Hull CS Blogs Application Now Live

image

If you are a fan of Hull Computer Science Blogs and have a Windows Phone then your life just got even better. Danny Brown has just made a Windows Phone application that provides ready access to all posts on the site, along with Microsoft Marketplace applications published by Hull students, RSS feeds and all sorts. It’s a free download, works a treat and you can get it from the markeplace here.